 |
| ... they ate. |
| What is it about Thanksgiving and excess? What provokes a usually judicious nature to fits of reckless extravagance, of sheer profligacy? Conspiracy theorists point a twitchy finger to the great cookbook publishing houses. I blame Julia Child. One can draw an unbroken line from her to Martha Stewart, to Rachel Ray, to the Food Network. She was a spook, after all. Before Julia (B.J. – wink, wink; nudge, nudge), one could depend upon the Thanksgiving meal consisting of the turkey, stuffing, gravy, mashed or sweet potatoes with marshmallows, cranberry sauce from the can, green beans with bacon, dinner rolls, some kind of molded gelatin dish, pumpkin and apple or pecan pies for dessert. No deviations. That was it. |
| Now, however, things are completely out of control, a runaway train of gastronomic overindulgence. Take the outlandish spread at one Duchess County home overlooking the Hudson River this year: four different dressings, two potato sides, a turnip dish, green beans, peas, a soufflé, two different cranberry relishes, not one, but two whole roasted turkey breasts - one brined overnight in bourbon, six desserts, and the star of the show, Paula Deen’s Turducken – an obscenity, a Frankenstein’s monster of a creation with a chicken stuffed inside a duck, stuffed inside a turkey. Had I not witnessed the beast with my own eyes, I would have put the creature down to pure myth, the fabled Minotaur or Lernaean Hydra. But there it was, trussed and sutured, just waiting for a zap of electricity to bring it to life. |
| And do you want to know something, my frightened and gentle readers? It. Was. Delicious. |
| Turducken - adapted from Paula Deen and Paul Prudhomme |
|
  |
  |
| PREP: If you're smart and have a good butcher, order the fowl de-boned ahead of time. He (or she) should keep the turkey leg and wing bones intact. Make all three dressings one day ahead of time and keep refrigerated until ready for stuffing. Thanksgiving Day, splay all three birds on a covered work surface or in sheet pans and season well with salt and pepper. Starting with the turkey carcass spread a generous layer of Jalapeño Cornbread stuffing all the way to the edges. Place the duck on top of the turkey and spread with a layer of Fennel Herb stuffing. Finally, place the chicken atop the duck and layer with an Apple & Golden Raisin dressing. |
| ASSEMBLY: Start with the chicken. Roll one side of the chicken around the dressing towards the middle. Repeat with the other side, returning the bird to a chicken shape. If necessary, use skewers to hold the flaps together. Set the rolled up chicken on top of the stuffed duck, placing it in the center and rolling up the duck meat around the chicken. Use more skewers to close the flaps of the duck. When the duck is securely skewered, pull out the skewers from the chicken. Place the rolled up duck/chicken on top of the turkey, centering it and rolling up the turkey meat around the duck/chicken in the same way as before. Fold the sides (and neck flap) of the turkey together and secure them by piercing them onto the tip of a skewer used to close the bird. Don't forget to remove the duck skewers. Kitchen twine is also a big help in holding the turkey shape. Place breast-side down on a flat roasting rack in a large roasting pan. Cover the tips of the wings with aluminum foil. Season the exposed side of the Turducken generously and evenly with salt and pepper, patting it in gently. Refrigerate the Turducken until ready to bake. |
  |
| BAKING: Place the Turducken in a pre-heated 225° oven. Bake until done, about 8 hours, or until a meat thermometer inserted through to the center of the Turducken reads 165°. At 4 hours: Tent the Turducken with aluminum foil. At 8 hours: Check the internal temperature of the Turducken. When the interior temperature reads 165°, remove the Turducken from the oven. Drain all the pan drippings from the Turducken for a gravy. Cover the Turducken loosely with aluminum foil and allow to rest for 1 hour before serving. Carve the Turducken: Remove the twine and skewers. With strong spatulas inserted underneath (remember there are no bones to support the bird's structure), carefully transfer the Turducken to a serving platter and present it to your guests before carving. Then place the Turducken on a flat surface to carve. Be sure to make your slices crosswise so that each slice contains all three dressings and all three meats. Cut each slice in half for serving. |
| Rhinecliff traditionalists were shocked, SHOCKED, to discover just how moist and flavorful the Turducken actually was. A pity really, as the beast will probably never, ever be reconstructed. Playwright James Goldman has a great quote about learning the Welsh language: "... a lot like learning to play the Irish harp. Very difficult, and in the end, not of much use." But now we can all say we did it once. |
| Thanks for taking the time - Blog O. Food |
Sunday, November 29, 2009
And on the 7th Day...
Monday, November 23, 2009
W.T.F.
 |
| So, things were supposed to slow down considerably after the last championship final on Thursday, but reality bears little resemblance to my hopes in that regard. It continues to be non-stop at the office and here on the home front as well. So, starving once again and faced with the still-empty larder, that Mother of Invention suckled this food diarist. |
| Couscous Salad - a Blog O. Food original |
|
  |
| In a small saucepan, bring stock, butter and salt to a boil. Once boiling, stir in couscous, cover and remove from heat. Let stand for 5 minutes. Fluff with fork before serving. |
| While stock comes to a boil, heat olive oil in a small sauté pan over medium heat. Add garlic, cooking to soften. Stir in remaining ingredients and heat through. After couscous has set, toss all ingredients together and serve. |
 |
| This salad turned out deliciously, a vinegary tang from the green olives was accented by the intensity of the tomatoes, and all the diplomatic sweetness from the pine nuts brought everyone amicably to the treaty table. But couscous is not really cooking. Come on, it took less than 15 minutes, start to finish! The kitchen didn't even heat up! |
| But I'll stand by this dish as another awesome side on Greek or Mediterranean Night, or when you're just in too big of a hurry for something more complicated. Who says cooking has to be hard anyway? |
| Thanks for taking the time - Blog O. Food |
Wednesday, November 18, 2009
1. 2. 3.
| Five championships down, four to go. It's been kinda fun coming up with something quick to eat and worthy of a blog post all at the same time. If not for You Gonna Finish That?, I'd be eating cereal or PB&Js, and who wants to read about that? But here's something I found in a British food magazine while abroad this summer. More of a brunch item, or an h'or d'oeuvre, but it falls into the cherished cheese category, so what the heck. The hardest part of the recipe was the conversion from metric to imperial units. |
| Bake herb Ricotta - adapted from Waitrose Food Illustrated |
|
  |
  |
| Beat. Spread. Bake. |
| In a stand mixer with the paddle attachment, beat the cheeses, eggs and basil to combine. Spread into a greased loaf pan or mold and bake in a 375° pre-heated oven for 30-35 minutes, or until the cheese rises a bit and begins to brown. Run a knife around the cheese to loosen and release cheese onto a platter. Serve on toasted sourdough drizzled with a little olive oil and rubbed with garlic cloves. |
| I never get to use my stand mixer. It usually spends its days as bulky kitchen decor, but I got it at a very good price, so don't really mind. I was thrilled to take it out for a spin. The baked Ricotta was so easy, it feels like cheating to write about it. I tossed a little leftover mesclun and avocado on the side, and I seem to be on a bit of a roasted tomato kick. But hey, I just go with the flow here. There's obviously some "higher power" in charge. |
| I wonder how this spread might be received on Chebeague next summer. We already have a baked brie appetizer. Is there room for another cheese dish at one of our cocktail hours? What am I saying! I'll run it by Muffy this winter to see if it passes muster. If FDA restrictions are less stringent around your house, pull this one out at the next grown up gathering. |
| Thanks for taking the time - Blog O. Food |
Monday, November 16, 2009
Da Kine
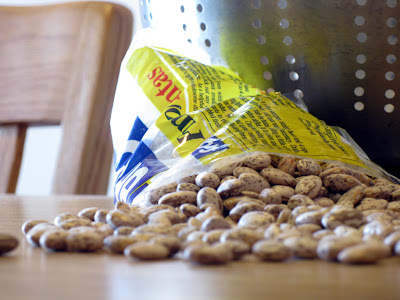 |
| Brea, California, circa 1965. Aunt Donnie sorts soup beans on my grandmother's linoleum kitchen table. After separating out tiny clods of dirt, she sweeps the beans into the chipped, white enameled colander that I love so well. They get a good thorough rinsing before going into a big pot of water to soak. |
| As I sorted my own pinto beans this morning, sights, smells and sounds whisked me back to that kitchen so long, long ago. Memory after memory washed over me. Early morning tea (with milk and sugar for me) with my grandfather at that same table. Nimble hands rolling out buttermilk biscuit dough. Fried chicken popping and sizzling in the giant cast iron skillet that was too big for me to lift on my own. The beans clinking into my own colander tapped out a sonata of one family's legacy of formidable cooks. I am just one more link in an accomplished chain. Is it any wonder I'm a food blogger today? |
| How funny that something as simple as beans could cause me to stray into such nostalgia. But don't let my reminiscence fool you, this is a post about Mexican food! |
| Championship Week is in full throttle, but a girl's still gotta eat, and I have a quick fix that is healthy and yummy. Like every good southern California boy, I've long since made it a staple: rice & beans. Great sides with any Tex-Mex main dish. Wrapped in a warm flour tortilla with a little cheddar cheese, it's a meal in itself. Sitting in the line up with Matty O'Food back in the day, we would oft discuss what would be for dinner after we finished surfing. If we wanted something warm that would stick to the ribs, it was refried beans, and Mexican rice. We called it Da Kine Mex, and still do. |
| Mexican Rice - a recipe by Blog O. Food |
|
  |
  |
  |
| Gringos try to complicate everything, but Mexican rice is so easy. Heat olive oil in a medium sauce pan over medium-low heat. While the oil heats, thinly slice whole cloves of garlic. Once the oil is hot, add garlic to the pan and stir constantly. Just as the garlic starts to sizzle and turn color, add the rice and stir to coat with the oil. Continue stirring the rice frequently to toast without burning individual kernels. Once the rice has a light toasted color, raise the heat to high, add the tomato sauce and water and bring to a boil. Reduce the heat to low and cook for about 15 minutes, stirring often. Remove from heat, cover and let stand for five minutes. Fluff with a fork and serve. |
| Refried bean - a recipe by Blog O. Food* |
|
  |
  |
| Bring a pot of soaked, rinsed pinto beans to a boil in lots of unseasoned water. Reduce to a simmer and cook, uncovered for 90 minutes. Begin checking the beans for doneness after an hour. The last 30 minutes of cooking, add the ham hock. The joint adds a lot of flavor the beans. Allow beans cool in their own cooking liquid before draining. Move cooked beans to a sauté pan with hot olive oil. Use a masher or fork to break down some of the beans. When the beans are heated through, stir in cheddar cheese to melt thoroughly. Season to taste. If necessary, cook in batches. The more often that you re-fry the beans, the fuller and richer the flavor will become. |
 |
| A one-cup serving of pinto beans has only about 240 calories. Combining beans with a whole grain like brown rice results in a complete dietary protein. Pinto beans contain 75% of a day's folate requirements, and are an excellent source of fiber. Studies indicate that men who include pinto beans and other high-fiber foods in their diet obtain as much as a 60-point drop in their total cholesterol. |
| When I'm starving, nothing is quicker or more delicious than to heat up some tortillas on a burner and roll them up with hot refried beans and rice. If I have an extra minute or two, I'll prepare them chimichanga style by frying the rolled burrito on an oiled griddle, then top with sour cream and hot sauce. A guilty pleasure. My stepmother always eschewed such pretense, preferring instead to take deep swaths of rice and beans with torn pieces of flour tortilla. She worked like a skilled backhoe operator! I would sit mesmerized admiring her economy of motion. She was no slouch, my stepmom. |
| Thanks for taking the time - Blog O. Food |
| *With considerable help from generations of Mexican cooks |
Thursday, November 12, 2009
Breakfast Served All Day
 |
| It's Championship Week at school, and I'm finally called upon to justify the wildly extravagant salary I pull in annually. Meaning lots and lots of extended hours on our athletic fields and a very narrow window for dinner. If I rush, I can whip up something quickly and still have time to put my feet up for a few minutes before getting back to campus. |
| As organized as I pride myself on being at the office, I'm an accidental tourist in my personal life, stumbling along oblivious to the chaos I nest in. I'll go weeks ignoring the growing pile of laundry until I'm without clean socks or shirts to wear to work. It won't dawn on me that the cupboards are bare until I'm looking for something to make for dinner. So tonight, if I was gonna eat at all, I had to run to the market and find something that would takes minutes instead of hours to prepare. I am lucky to live within the confines of New York's real Little Italy in the Belmont section of the Bronx. Fresh is just blocks from the front door. |
| Mesclun salad with poached egg & lardons |
|
| *"Brown eggs are local eggs, and local eggs are fresh!" |
  |
  |
| In a small mixing bowl, toss whole grape tomatoes in olive oil and a couple pinches each of dried basil and thyme, salt and pepper. You know I hate measuring, so I've learned a thing or two through trial and error. Add a little more basil than you would thyme. Everyone ought to know how to season with salt & pepper. If not, see you at IHOP. Put tomatoes into a small baking dish and place in a 450° pre-heated oven for 20 minutes. Cut pancetta into a large dice and set to browning in a skillet over medium heat. Once crispy and brown, drain on paper towels. Wash your greens and give them a ride in a salad spinner. Five minutes before the tomatoes come out of the oven, prepare a shallow bath of very low boiling water with a tablespoon of distilled vinegar. Break eggs separately into small bowls and slowly roll them into the hot water bath. Poach for three minutes for soft yolks. While eggs poach, gently toss greens with a good homemade vinaigrette and arrange greens on a pretty platter, sprinkle lardons of pancetta around the mesclun and arrange roasted tomatoes. Place poached eggs atop greens and serve. |
  |
  |
 |
| There's a reason diners serve the morning meal all day, it's because they can! |
| Gotta dash - Blog O. Food |
Sunday, November 8, 2009
We Call It Maize
 |
| So, during the aforementioned conversation with my boy Matty, I had already decided on centering a main dish around polenta and was mulling over what to do with all the inevitable leftovers the next day. We must have been talking about our favorite topic, bacon, because what I came up with set both our mouths to watering and our eyes to tearing: |
| Huevos rancheros on polenta - a recipe by Blog O. Food |
|
| Matty and I are sauce men. Salsa is fine for chips, but a good sauce, expertly turned out, can make grown men swoon - these two men, anyway. So instead of tomatoes, I opted for a Mexican red sauce to soak into the polenta and top my eggs. |
| Before starting the sauce, brush leftover polenta with a little olive oil and place in a pre-heated 350° oven and bake for 20 minutes. Cut the baked polenta into desired shapes. |
 |
| The sauce: |
| Heat Ancho chilies for 30-45 seconds in a hot, dry skillet to release some of the oils and intensify the flavors. Turn them several times. You're not really toasting the chilies, which can turn bitter very quickly, but rather coaxing out some of the flavor. Steep the heated chilies in a small sauce pan with just enough slow boiling water to cover. Simmer for 15 minutes. Transfer the chilies and 1½ cups of the liquid to a food processor along with the garlic, crushed allspice & peppercorns and salt. Purée for several minutes until the sauce is completely smooth. Adjust the seasonings to taste. |
  |
| Run the sauce through a sieve and back into the saucepan. Add the olive oil and bring to a simmer. Cook for 10 minutes. Remove from the heat and use immediately, or transfer to a glass jar. The sauce will keep, refrigerated, for one week. |
  |
| While the sauce simmers, poach 2 eggs in a shallow pan of just barely boiling water. You want only enough water to cover the eggs once they're placed in the pan. I was always told to add a splash of distilled vinegar to the water. It's supposed to help the eggs retain their shape. I don't know where I first heard this, but it seems to work, so I have not investigated the method any further. Poach eggs for 3 minutes and remove from their bath with a slotted spoon. |
| Place pieces of baked polenta on a serving dish, top with poached eggs and drizzle with the red sauce. I was gonna crisp up slices of pancetta, but feared straying too far from my Mexican roots. I went with thick-cut bacon instead. |
  |
| Red sauce is complex and intense. You can remove the seeds and membranes from the dried chilies before you toast them. Most of the heat is locked in there. Be sure to wash your hands thoroughly after handling dried chilies, and never, ever touch your eyes, nose or mouth without doing so first. The allspice and peppercorns add more layers of flavor. Whole cumin and clove are also sometimes used. Traditionally, eggs are fried for this dish, but I've always loved a good poached egg, and my doctor loves my heart-healthy ways! |
| Back in 1998 I was in the middle of a cross-country road trip along Interstate 10. I was headed to San Diego for three months, escaping the summer heat of Miami, FL. One early morning, deep, deep in Texas territory, I answered my rumbling stomach in Sonora, where I stumbled upon the best huevos rancheros I have ever eaten. Fresh, homemade corn tortillas, double-thick slices of bacon, eggs and refried beans cooked in alarming amounts of bacon fat, and chili sauce a crimson color Harvard would be envious of. It was such a memorable breakfast, that I have never forgotten the name of the place: Mi Familia Restaurant 605 S. Crockett Avenue Sonora, TX 76950 (325) 387-2940 I'll bet I could drive there blindfolded even to this day. |
| I don't know if polenta will ever take the place of corn tortillas in huevos rancheros, I'm not convinced it really should. But now you have one more resourceful way to serve up leftovers without compromising your principles or offending your Italian and Mexican neighbors! |
| Thanks for taking the time - Blog O. Food |
Grilled polenta
 |
| It took B.O.F. bff and new papa, Matty O'Food, to lure me back to Blogspot Dot Com. I've been in an extended funk since returning from Europe. I didn't realize it, but after so many great meals shared with friends, I just couldn't face cooking for one again. Where's the inspiration in that? But Matty's foodie IMs stirred the sleeping muses and I am once again looking with fondness at my kitchen. |
| During one of those online conversations, I surprised Matty - and myself - with a northern Italian spin on a classic Tex-Mex breakfast dish. Corn meal was gonna make a guest appearance, but polenta is a time-intensive affair, and one doesn't just whip up a dollop or two on a whim. Only by planning a couple of dishes was I able to justify the labor involved. |
| Polenta 101: |
|
| In a heavy-bottomed pan, bring water to a boil. When rolling, whisk in polenta in a slow steady stream. Reduce the heat under the pot to low and continue to stir the polenta constantly for a few minutes until the meal becomes suspended in the liquid. Cook at a low simmer for 1 hour, stirring periodically. After an hour, whip in the butter, remove polenta from heat and stir in the cheese. |
| Cooked polenta should be silky and creamy, with a pourable consistency. It wonderful sauced with a ragù or sautéed mushrooms. You've seen it here with cacciatore. As polenta cools, it sets up quickly. Firm polenta can be cut up then baked, grilled or fried. Pour finished polenta into a large, ungreased baking dish and spread evenly with a spatula. Let the polenta set and do not cover until completely cool. Once firm, let your imagination run wild with serving ideas. Enzo's of Arthur Avenue was in my crosshairs. |
| Grilled polenta & cannellini - adapted from Enzo's of Arthur Ave. |
|
   |
| In a large stockpot, cover soaked cannellini beans in plenty of water and set over a high flame. Once the beans come to the boil, reduce to a low simmer and cook beans for about 2 hours. Stir occasionally to keep the beans from crowding and sticking to the bottom of the pot. Make sure the water level stays a couple of inches above the beans at all times. Do not add any salt until the end of cooking. Salt interferes with the cooking of dry beans making them tough. |
| Start checking the beans for doneness after 60 minutes. Cooked beans should be tender. Under cooked beans will be grainy feeling in the mouth. Do not drain cooked beans immediately, but allow them to cool in their own liquid. If drained while still hot, the skins crack and the texture gets ragged. Reserve the cooking liquid once you drain the beans. |
  |
| As the cannellini beans cool, remove the sweet sausage from its casings and crumble into a large skillet and brown completely over medium heat. Allow the pork to cool a bit, then transfer to a food processor. Break down the meat into a coarse texture with short pulses. |
  |
| Ladle some of the reserved cooking liquid from the beans into a sauté pan. Add a few tablespoons of beans and sausage. Reduce the sauce for 10 minutes. Season to taste with salt and red pepper flakes. While the sauce reduces, brush polenta squares with a little olive oil and cook on both sides on a hot grill. The polenta is already cooked. You're basically looking for nice grill marks to tease the eye at the table. Spoon the cannellini and sausage sauce over the cooked polenta and serve right away. |
 |
| I have a standing invitation from Enzo's chef Harpo to invade his kitchen where he will divulge some of the state secrets behind their more famous dishes. Before taking him up on the offer, I thought I would have a go at one of my favorite appetizers of his. I think I got pretty close. At least I pushed away from table satisfied. And that's all that really matters now, isn't it. |
| There was a good two-thirds of a pan of polenta leftover for breakfast the next morning. You're not gonna believe what I served up. Until then... |
| Thanks for taking the time - Blog O. Food |
Subscribe to:
Posts (Atom)